Wednesday, November 11, 2015

Mini Gear Guide : Five Faves For all Seasons

Since I am currently in graduate school, we are down to taking one or two bike tours a year.  When we return from our travels,  we must face the concrete jungle that is Denton, Texas. This year, I'm lucky enough to bike Neva to school, and enjoy 25 miles of biking throughout the day. In going back and forth between touring and commuting, I've noticed a few pieces of gear that work great for both purposes,and in all seasons.  There are things like bike lights, a helmet, a pump and patch kit, etc. that are a given every time you ride, but this list is of the not-so-obvious must-haves for the chronic cyclist.

Two girls attacking the concrete jungle for Neva's first day of Kindergarten. A child one day asked her, "Neva, why do you always bike to school?!" and Neva replied, "Why don't you always bike to school?"

1. The Buff
- The Buff is ingenious in its simplicity. At first glance, it looks like just a stretch tube of fabric; not very exciting, but after using this product over many miles, the usefulness shines through.


For both on tour and commuting, the Buff can act as a balaclava to protect your face from the cold.  On hot days, if you're touring in the desert, your mouth is protected from sand from the prevalent dirt devils of a vast and arid climate.  When commuting in Texas, every morning on the bike path and around sidewalks, leaf/sand/pine needle cleanup uses blowers and weed wackers to keep the sidewalks looking nice (I guess?). Covering up with a Buff is just the thing to keep unexpected gnats, cold, dust, etc. out of your mouth.  There are many other ways to wear the Buff to keep your hair out of your face as well, but for me, having quick access to an instant mouth barrier provides the most useful service.

Neva used the Buff as a head scarf when commuting by subway in NYC.

2. Da Brim
- Simplicity will be a common theme with the products I use most regularly.  Da Brim is a circle of fabric that velcro tightens around your helmet, giving shade that is equivalent to wearing a 10-gallon hat.

Neva and I are sporting da Brim look.  Neva's is handmade by me, and mine is the $50 version available only online.

Da Brim is not much more glamorous than an umbrella hat, but I got tons of compliments from people on RAGBRAI, and biking on the bike path during the Texas summer, because it looks smart. The level of protection goes all the way around, protecting your face and the back of your neck.  For anyone that wears glasses, this hat addition is also helpful when it rains. The only downfall of this piece of gear is when it's really windy.  Sometimes, if the wind catches da Brim just right, the whole helmet will come up.  This is sometimes the case if you have a small head (like me) and your helmet just barely fits, or if you just shaved your head and now your helmet fits a little bit larger. Usually adjusting your helmet to fit properly will address this issue.

Neva's brim is still a work in progress, but with about $2 invested in the above recycled materials, we've had fun experimenting.

3. A Bell
- Ding ding. The universal cyclist communication mechanism.

A bell might not seem that important, but if you're ever on a shared bike path, you will notice that EVERYONE, runners, bikers, walkers, etc., wear earbuds and are listening to music. You can scream, "on your left" all day, and on the off-chance they hear you, they will just wonder why you're screaming at them. It's better to just have a bell to try and warn them of your presence.  If no reaction, just try to go around them as safely as possible.


Off-road or on tour the bell can come in handy for a few reasons.  If you're in the wilderness, sometimes it's good to have a bell just to alert the animals of your presence, if your clunky load isn't already scaring off everything in a 2 mile radius. If you're on the open road, it's a good way to say "hello!" to the elusive other-cycle tourist. Maybe they'll even stop to chat and you have made a new best friend. Good communication is key in any relationship.  Since we share the roads with everyone, the bell is the least threatening way to say, "hey, I'm here".

4. Super Collapsible Backpack
- An extra bag that is so lightweight and collapsible, that you don't even remember it's there until you need it, and then you're glad it's there.

Collapsed version
When on tour, the stashing of a tiny backpack that's smaller than my fist is best used for grabbing some groceries when you are in town.  You don't want to go fully loaded to the grocery, and most of your bags are filled with gear anyway, so you need an extra bag.  Since you won't be getting more than a grocery bag full anyway, usually just 1 or 2 meals worth of food and some snack bars, one bag works well. I prefer the backpack form so that I don't have to do the ol' 'hold it on your handlebars' thing, though a plastic bag or reusable shopping bag would work too, as they are just as light an collapsible as the backpack.

Open bag, with tiny attached mini bag sewed to the inside.
When I'm commuting, I typically use the backpack when I am going to grab lunch. Again, so I don't need to bring my school supplies with me. Sometimes I may even use only the backpack instead of panniers if I just need my wallet and phone, with the possibility of an unforeseen purchase. The great thing about it is you don't have to lug around a pannier which goes on your shoulder once you arrive, you've got your necessities comfortably on your back. The bag is so light,  I typically forget I am wearing it, and it doesn't cause the unfortunate sweaty back syndrome.

Very simple : one top main zipper, one small side zipper (made to fit keys and things), adjustable straps, and a loop on the mini inside bag so you can carabiner it to a belt loop or large bag when it's in collapsed mode.

In use for holding snacks and necessities when on a bus in Costa Rica. All the other gear is stuffed under the bus. Oh look, the Buff made a second appearance!

5. Pockets...Anywhere
-I'm not picky, pockets on your back, on your shorts, on your shoulder, wherever, I just want some pockets.


Mostly, this comes in really handy so that you can put your phone within hearing range when you're biking around a city, trying to find a place you've never been.  The most handy that I've found is the velcro breast pocket found on adventure style shirts.


Some ladies might find it uncomfortable to put anything in the breast pocket, and that's when cycling pockets come in handy, or a sleeve pocket/phone holder. Short/pants pockets can work, but you can't quite hear directions as well if you're in a high traffic situation. You of course can put anything in your pockets that you wish (Neva likes rocks, leaves, etc.) but I have found phone directions are the most useful. 

Give yourself a high five, just for being awesome, and let us know any necessities you like to always have handy when biking. My next post I'll discuss an in depth list of my first aid kit, and when some of my odd choices can come in handy.


Friday, September 4, 2015

Summer Bike Tour 2015 - Where'd we go?

Hey all, we made it through our trials on the trails! We got back a few days before school started (for both of us), with Neva starting Kindergarten, and me finishing my final year of my master's. Just to catch you up on where we went, I have a few maps to share.  First, we biked across Iowa, on the world-renowned RAGBRAI.


This was a great year for Neva's first year of pedaling.  The terrain wasn't too difficult, the weather stayed comfortably in the 80's most of the trip, with even a few welcomed showers, and we had a tail wind most of the time!  We were even recognized and interviewed by a local Iowan news, Channel 13


And that's the rig all set up.  We decided to take the Kidz Tandem for this trip. Neva felt large and in charge being up front, and both her and the bike got lots of attention. The question I got most often is "Is she steering?!". No, she is not steering, there is a long steer tube for me that goes down to a linkage bar which attaches to the front wheel, so I'm able to steer from the back.  It's a similar idea to the dutch cargo bikes.


Neva did great.  She definitely passively pedaled most of the time (don't get your hopes too high for them pulling their own weight!), but when we were going uphill, she would stand up on her pedals and work it!  If she got tired, she would put her head down on the handlebar bag in front of her to keep her eyes out of the sun, and she would hydrate herself with the easy-access water bladder tube that I attached to the handlebars. Through rain or shine, she didn't complain...much.  

Neva navigating on a rainy day.  She had the maps up front and loved pointing to the next town.


Well, she complained less than any adult, and that's pretty good. 

Neva not wanting to sleep in the tent again; confused as to why there are homes with people around us, and wondering why we are not staying in those homes.

As mentioned in the previous post, we did have some trials with transportation, but thanks to many favors of Warm Showers friends, we eventually made it to New York to start the Adirondacks tour.  Here is a rough map of where we went : 

And here are most of the places we went : 

Schenectady, NY
Speculator, NY
Indian Lake, NY
Inlet, NY
Long Lake, NY
Tupper Lake, NY
Saranac Lake, NY
Keene Valley, NY
Plattsburgh, NY
Isle la Motte, VT
Saint-jean-sur-Richelieu, QC, CAN
Chambly, QC, CAN
Montreal, QC, CAN
Ingraham, NY
Ausable Chasm, NY
Burlington, VT

The Adirondacks are nice to bike around with the picturesque lakes and forest scenery, but know what to expect!  Those mosquitoes are no joke; little syringes with wings, they hurt! And the ticks, they are smaller than the dog ticks that I'm used to seeing in CA, AZ, and TX, and Lyme disease prevalence is increasing at an alarming rate.  This is thought to be from temperature changes affecting their life cycles, creating larger numbers. 

What the locals use for small critters. This stuff is sold all over the local shops. 

The temperatures were ideal, the terrain wasn't too aggressive, and the views were nice. The shoulders, for the most part are pretty wide, but many of these areas are frequented as a getaway by many New Yorkers, so you will see a high volume of people within a tiny area in many of the lakes, especially around Inlet and Lake Placid. We enjoyed many of the things that draw the tourists, visiting the museums in the areas, kayaking when we could, and taking the time to eat lunches by the lake. 

Neva at the Wild Center in Tupper Lake, NY
We left the Adirondacks, and headed up to Canada via the Champlain Islands. We had officially hit the flatlands on our trek north, with terrain that (oddly enough) looked a lot like Iowa. 

Quiz : is the above A. Somewhere in upstate NY, B. Champlain Islands, VT, C. Somewhere over the Canadian border, or D. Iowa.  Hint, it is NOT Iowa!
The answer to the above question is 'all of the above.' Corn fields, farm houses, and tractors as far as the eye could see. I knew I had raised my girl on RAGBRAI when we stop to use the restroom and Neva wants to take a picture with the corn. (And yes, the picture above does show her resting on the handlebar bag!) 

Though the populations are tiny, we did come across some bike-friendly places that cater to this common bike route (which is different than charging cyclists high prices because they're the only service around).  Luckily, on Isle La Motte, we found a quaint little community style bed and breakfast to stay at to break up the trek from Plattsburgh to Chambly.  


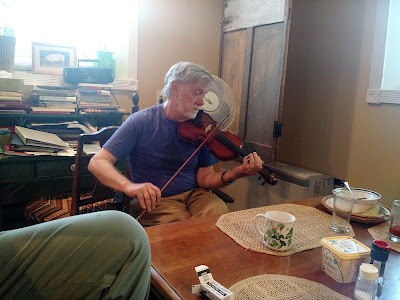
The Old Schoolhouse is run by Carol, one of the warmest persons I've ever met! She has a beautiful garden outback which we were able to pick from for fresh kale, tomatoes, squash, etc. to have for our dinner that night. There were also chalkboards in the rooms so you could write friendly notes for her. Carol is also an amazing baker, and we awoke the next morning to the aroma of lemony fresh baked scones. The Schoolhouse also draws a fun crowd.  There were two other couples that stayed that night, and we had a community style breakfast, and shared stories.  One man made killer eggs and serenaded us all with his melodic tunes on the violin. What a great way to start a biking morning!


We then ventured into Canada. Once we got to Saint-Jean-sur-Richelieu, the corn fields faded away, and we were back in civilization with beautiful bike paths and buzzing town squares, centered around water and green parks. Everyone was out and about.  We were no longer the lone rangers, but joined by an extended community of active people smiling, sweating, and speaking french. 


Chantale and her family welcomed us into their home in Chambly, Quebec. They took us to the park for a picnic lunch, and we sat next to the falls enjoying the water, and looking at the tiny life seeking refuge amongst the rocks. 


 They also took us kayaking. Chantale's husband Martin had just finished building two of his own simultaneously and was anxious to try them out.

Martin teaching son Remi how to flip upside down and right himself again with his handmade kayak, in their pool in the backyard.
Afterwards, we headed back over the border, and finished our tour in Burlington, VT. It was a great way to end our tour.  We stayed in a community house of 8 people, three of which work at different organic farms in the area.  After our long day of biking, we were met with tempura vegetables over quinoa with fresh picked greens and handmade dressings. The next day, we were able to head out to the goat farm and join in the children's summer camp, focused on teaching children sustainable practices for farm life, and how to work within a community. 


Neva fit right in and instantly made friends with human, chicken, and goat alike. Also geeps.  Did you know this was a thing? Sheep + Goat = Geep.  Yes, even I learned something new that day!

This morning they had chicken chores.  Neva's group was in charge of watering the chickens. 
We then went to the ECHO museum, dropped our bike off at Old Spokes Home in Burlington, a non-profit which houses an impressive bike museum in the attic, and then we had dinner with our good buddy Ed, a long time friend from our days in Flagstaff, AZ. 

Me at Old Spokes Home bike shop, basking in the coolness of old ordinaries, safeties, chainless bikes, early tandems, and the like. 
We ended our tour visiting family in NYC and Philadelphia.  Neva talked about seeing Grandma Stephanie the whole trip, and got to end with some much needed grandma spoiling, after 5 weeks of a rigorous 1000 mile biking schedule. The grandparents threw her an un-birthday party since we probably won't see them on her actual birthday this year. Stephanie pulled out her cake making tools, and we all had a ball making her cake. Here's the result :


 In the end, I think Neva concluded...


(and VT, PA, and QC)...but, I'm ready to go home...for now.


Total trip; planes, trains, bicycles, etc. 


My favorite [bike] things coming up in the next blog...

Saturday, August 1, 2015

Quick Post : Adirondack Tour

Hey folks!  It's been a little bit since we've had a chance to post because the service is pretty scant here in the Adirondacks.  I have lots of things I want to post about, but don't quite have the time now as it's almost noon and we haven't left yet.

Neva at the beach at Camp Fowler in Speculator, NY

We did RAGBRAI, that was fun, and I have a post of that to come.  You can take a quick look at the small interview we had.

Neva fits right in at RAGBRAI!  She did about 350 miles of the total 470. 
We had some troubles on buses and trains which delayed us by 3 days, but luckily there were many kind warm showers souls to help us out when we were down on our luck. 

Thanks Carla!


Thanks to Carla, we got on our way, and kept a smile (mostly) on our faces.

Um, well, she was smiling...

Currently we are in Indian Lake, and hope to go a little west through Raquette Lake to Inlet, NY to check out some mountain bike trails there.


This morning when we woke up, Neva touched a slug and it got fatter, and left goo on her finger.  She would touch it and then go, "Eeewww", and proceed to touch again...
We've had some issues with brake rubbing, clunky shifting (a derailleur that doesn't want to stay in place), and a slightly squirrely linkage bar, but overall we are doing okay. Six different people have looked at it, but it seems that things are just tight with a triple chain ring and disc brakes, even though it has a Santana spacing in the rear (145 mm). Maybe the Inlet bike shop can offer a good fix.

Here's us as we headed off yesterday.

I don't want to leave you guys thinking it's all doom and gloom!  It can't be all bad when we have days like this...

Our warm showers host in Schenectady had a farm, and Neva got to pick fresh blueberries for dessert that night.  Happy trails, and I'll try to write soon.  Back on the ol' asphalt trail again!


Wednesday, July 8, 2015

Mistakes and Lessons Learned on Bike Tour

Just like with anything else, starting long distance touring can have a steep learning curve.  It is even steeper if you've never really camped before and don't have the right gear.  Earlier this week I bumped into a fellow biker named Christopher who is just getting started and he said my story was inspirational.  Well him being inspired got me thinking back through some of the things I've learned from my experiences touring, and I was inspired to share. Here are some tips that I learned (sometimes the hard way) when I was just starting out, and some that I've learned recently, even after years of experience.


1. Don't settle for crappy gear.

Yeah, we know that you're not going to have any gear, you're just starting out.  Don't make things harder for yourself and try to spend $3000+ dollars on new gear or DIY everything (that you're not even sure how to use yet) and have it break on you, just ask a friend. We all have at least one active friend that has all kinds of gear, and they aren't camping year round, so just ask them to borrow stuff.  Each tour you'll get a nice hand-me-down sleeping bag because someone bought a new one, or a tent at a super cheap price from steepandcheap.com, or you lucked out by going to a thrift store; and soon enough, you'll be the friend with a bunch of cool gear.

This is my outdoorsy friend Matt.  He was the Cross-fittiest, adventure racering, bike/mountain/hikey guy I knew when I was building my gear.  He loaned me many a gear for many a trip. 
Because you can't build up to this overnight 

It may not look like much, but these are all the basics, the idea is to travel light, right? (Que #2)

2. Don't carry too much (or too little).

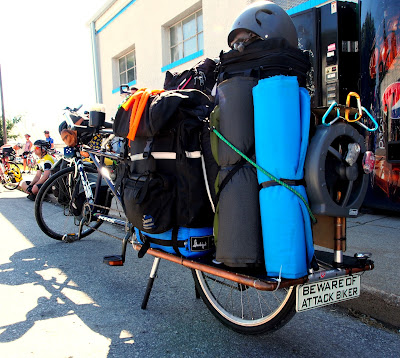
Carrying too much is actually inevitable, so accept it, BUT while you're riding, evaluate what works for you and what doesn't.  Don't get caught up in being too light either, especially being new to the game. It's okay to start off heavy because the remedy is easy : ship everything you don't need back to yourself or friends. If you are starting in cold country, and going to hot country, swap out gear at a "pick up" spot which can be a friend's house or a postal service pick up. For small things (under 1 lb), use US Postal Service, and for larger items, use FedEx.  For shipping bikes, you can use bikeflights.com for less than $60.

Just please don't carry as much as this guy.

Eventually, you may even look like this guy.  This is Cjell Mone, and he rides the Great Divide Race, and many of the adventure tourers pack ultra light like this because they're riding 200+ miles per day on aggressive terrain. Amazing! Cjell actually yo-yos, where he does the entire 2768 miles, and then turns around and does it again...taking around 2 weeks each way.  Someday...
3. Research your area.

Adventure Cycling maps make it pretty easy for you, but make sure you know your route, alternate routes, where the nearest greyhound is, water sources, food sources, etc. There are so many things that can happen, you want to leave your options open. It's especially important if you're remote or off-road, where you definitely need an accurate odometer.

I collect maps from on the road.  This is one from a local firefighter, and he is giving me advice on route options.  Firefighters are your friends, especially when you are very remote.  They may be the only humans you come into contact with for a few days, and they obviously love wilderness, so they're great companions when you bump into them. They also watch out for us whether you know it or not. Someone out in the back country noticed me biking, and called the man to which the fingers above belong. He followed my bike with  trailer tracks to make sure everything was okay and that I had enough supplies.  I love these people!
If you've never seen an Adventure Cycling Map, here is part of one above, though this portion doesn't give it justice.  This is a section that shows elevation changes.  The maps are geared toward bike friendly long distance touring routes, and include campsites, places to get water, streams, places to get food, local bike shops, hotels, etc. They even have a list of phone numbers to the bike shops, hotels, campsites, local emergency areas for each town that you go through.  Most maps cover around 300-400 miles, and really anyone who lives should have these maps.
4. Become part of a Bike Network.

I recommend using warmshowers.com to find a place to stay at the start of your tour.  This site is made up of a cycling network that offers other cyclists hospitality, but the people involved also are a great source of local knowledge and can lead you in the right direction (literally) for starting out. Consider that most times you will start out from a big city, because you will fly/train/bus to a larger hub, and the locals will know the safest way to pick up the ACA routes, and anything weird within a 100 mile radius or more.

This is my good friend Chris.  He hosted us last minute when we were first riding the GDT. We've stayed in contact because our personalities were very similar.  Warmshowers opens up a door to extending your family, and meeting lifelong friends like my buddy Chris and his wife Mary. 
5. Know your body.

We may not all be nutritionists, but you want to listen to what your body needs while you ride. This is an endurance sport, so it's necessary to maintain a diet that will sustain long days. For emergencies, always carry a quick source of sodium like pickle juice, mustard packets, or salty smoked fish.  There is also a powdered food called soylent that has come out which contains all of the nutrients that you need in a day. Also consider the climate that you're in.  For instance, in very hot climates, I eat lots of raw fruits and vegetables as a way to carry extra water, and forwent anything dehydrated (like raisins or granola).


6. Know your tools, and use them regularly.

Multitool, pump, extra spokes, etc. Make sure you have some basic tools and replacement parts for anything that could prevent you from biking, but can be fixed well enough to get you to a bike shop. Tighten all of your bolts, panniers, etc., check your tire pressure, and do a quick look-over your bike daily, once before you head out, and once when you get to where you need to be. Carry extra bolts. Carry zip ties, duct tape, and velcro straps of various sizes in case everything above turns into a worst case scenario.

Be like Neva, this is her looking my bike over before we leave.
7. Always carry sunscreen.

I use Super Salve, which is handmade by Denise in Silver City, NM.  It's all natural, and uses titanium dioxide as a natural barrier for protection.  Also, it smells awesome, isn't greasy, and doesn't leave you bright white and looking like a ghost.

Because you will get sun, and lots of it. Thanks to Super Salve, I don't get burned though!

8. Trailers and accessories

I've only been stranded once out of my 7+ years of touring and it was last year. I was given a trailer to test, and I had tested it about 100+ miles off-road locally in Texas, but not on any 4x4 trails.  The trailer busts a spoke the moment we get to a semi aggressive portion of the GDT. It was because I did not go over the trailer with the same eye that I go over my bike. The wheel had only 16 spokes, while my bike wheels have 40 spokes, and I wouldn't ride with much less.

If you're going to carry a trailer, make sure you consider everything that you would on a bike that would make it tour-ready. Can it handle the bumps (wheels, tires, hitch articulation, etc.) over bumpy surfaces. Can it carry the weight required for your purposes and still maintain its integrity. This type of scrutiny should also be done on bags and racks, and always, always pretest your gear before you go.

Here's us walking after a trailer failure.  Eventually, I just biked to the closest town while these two watched our stuff and fended off mountain lions. 
Summary of resources :
Cheap gear : Steepandcheap.com
Cheap way to ship bikes : Bikeflights.com
Maps : Adventure Cycling Association
Bike Network : Warmshowers.org
Soylent : (I use) 100% food
Sunscreen : Super Salve
Place to buy quality bike gear : Bike Shop Hub

I hope this list is helpful to all you potential tourers out there!  Let us know if there any lessons you've learned from bike touring that I missed.